

Dr. Amir Guorgui completed his dental education at the University of Montreal in 2001. He holds a prestigious Mastership designation at the College of Sedation, a recognition of his unwavering dedication to delivering top-notch sedation services to his patients. As an esteemed member of the Vaughan community, Dr. Guorgui takes great pleasure in connecting with his patients and imparting valuable knowledge about their oral health.
How Porcelain Veneers Are Custom Fabricated: From Impression to Installation
Key Takeaways
- Porcelain veneers are highly durable (up to 15 years), biocompatible, and offer superior aesthetics.
- Composite veneers are more affordable and quicker to apply, but less resistant to staining and wear.
- The veneer process includes: consultation, tooth preparation, temporaries, lab fabrication, and final bonding.
- Digital impressions (e.g., iTero) provide greater accuracy and patient comfort than traditional methods.
- Temporary veneers protect sensitive teeth and help preview the final result before permanent placement.
- Alternatives include composite bonding, crowns, Invisalign, and teeth whitening, depending on the patient's needs.
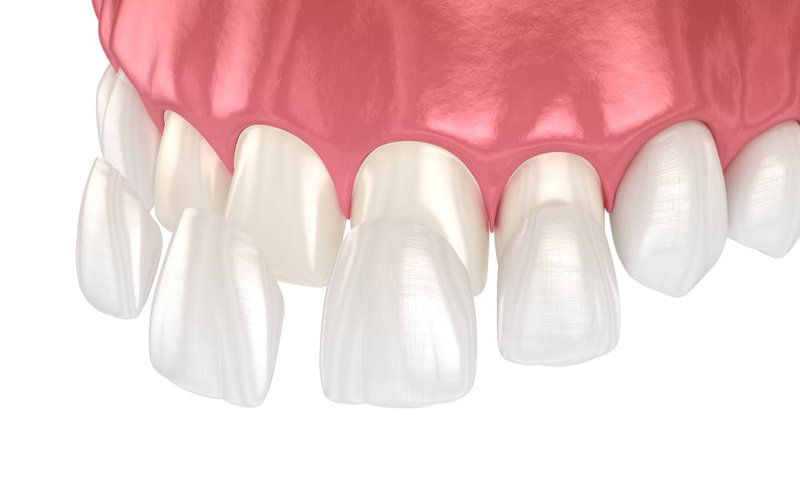
What exactly are porcelain veneers made of?
Porcelain veneers are wafer-thin shells that are bonded to the front surface of teeth to enhance their appearance. But behind that perfect smile is a complex process involving highly engineered materials. The two most common types of materials used for dental veneers are porcelain and composite resin.
Porcelain: The Gold Standard
Dental porcelain is a highly engineered ceramic material developed for long-term use in the oral environment. It is valued for its exceptional aesthetic properties, biocompatibility, and mechanical strength. According to the American Dental Association (ADA), both feldspathic porcelain and glass ceramics, such as lithium disilicate (e.g., IPS e.max), demonstrate high survival rates. Glass ceramic veneers show a cumulative survival rate of 94% over 7 years, compared to 87% for feldspathic porcelain over 8 years. These materials are considered highly resistant to abrasion and offer a long-lasting aesthetic result.s
- High durability (lasting 10–15 years with proper care)
- Excellent biocompatibility
- Natural translucency and aesthetics
However, porcelain veneers require more enamel removal during prep, and they are generally more expensive than composite alternatives.
Composite Resin: Cost-Effective Alternative
Composite resin veneers can be applied directly in a single dental visit. While they don’t offer the same translucency or longevity as porcelain, they’re still a valuable option:
- Less enamel removal
- Lower cost
- Easier to repair if chipped
But: they are more prone to staining and typically last 5–7 years.
Material Comparison Table
| Feature | Porcelain Veneers | Composite Resin Veneers |
|---|---|---|
| Aesthetics | Very natural, translucent | Less natural |
| Durability | 10–15 years | 5–7 years |
| Stain Resistance | High | Moderate to low |
| Biocompatibility | Excellent | Good |
| Enamel Removal Required | Moderate | Minimal |
| Repairability | Needs full replacement | Easily repaired |
| Cost | Higher | Lower |
"Choosing the right veneer material isn’t just about looks — it's about long-term oral health and lifestyle compatibility," says Dr. James C.H. Ko DDS. "Porcelain may be the go-to for aesthetics, but composite has its place in specific cases."
How is the initial impression of veneers taken at the dentist?
The accuracy of your dental impressions can significantly influence the final look and fit of your veneers. Impressions are the blueprint for crafting custom veneers, and they can be taken using either digital scanning technology or traditional physical moulds.
Digital Impressions: The Modern Approach
Dentists are increasingly using intraoral scanners, such as iTero or TRIOS, to create precise 3D images of a patient's teeth. These high-resolution scans:
- Improve patient comfort (no goopy materials)
- Increase accuracy, reducing the need for remakes.
- Speed up communication with the dental la.b
A study published in the Journal of Prosthetic Dentistry (2019) demonstrated that digital impressions are at least as accurate — if not more — than conventional ones for single-unit restorations.
Physical Impressions: Tried and True
Despite the rise of digital technology, traditional impressions using PVS (polyvinyl siloxane) or alginate materials are still common. These require the patient to bite into a tray filled with soft material, which then hardens to form a mould.
Pros:
- Cost-effective
- Still widely accepted by labs.
Cons:
- Can be uncomfortable
- More prone to human error or distortion
Step-by-Step: Taking an Impression
- Initial Evaluation – The Dentist inspects your teeth and gums.
- Preparation – Minor enamel reduction may be done beforehand.
- Impression Material or Scanner – Either the scanner is used, or trays are filled with material.
- Sending to Lab – The resulting image or mould is sent to a dental lab.
- Review and Adjustment – Temporary veneers are fitted if necessary.
"Digital impressions allow for superior patient experience and lab communication," notes Dr. Amir Guorgui, BSC, DMD, MACSD. "But the decision often comes down to the dentist's tools and the complexity of the case."
What steps are involved in the veneer teeth process?
Porcelain veneers are not a one-visit procedure. They require a structured process that ensures both functional durability and cosmetic success.
1. Consultation and Examination
The journey begins with a comprehensive consultation:
- Oral exam and imaging
- Discussion of aesthetic goals
- Evaluation of oral health (e.g., gum disease, decay)
This stage determines whether you’re a candidate for veneers and what results you can realistically expect.
2. Tooth Preparation
Once approved, the dentist will:
- Remove a small amount of enamel (usually 0.3–0.7 mm)
- Ensure the surface is ready for bonding.
- Take the impression (digital or physical)
Local anesthesia may be used, especially if the teeth are sensitive.
3. Temporary Veneers
While your permanent veneers are being fabricated (usually 1–2 weeks), temporary veneers may be placed. These are:
- Made from acrylic or composite resin
- Bonded with a weaker adhesive for easy removal
Although not as durable or aesthetically pleasing, they help you preview the final result.
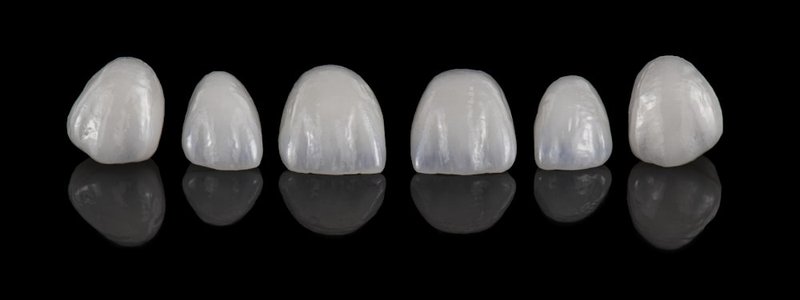
4. Lab Fabrication
The dental lab takes over:
- Veneers are custom-made based on the impression
- Colour, shape, and translucency are matched to your natural teeth.
- Takes 7–14 days, depending on the complexity
Lab communication is crucial at this stage — digital scans often expedite this process.
5. Final Bonding
Once the veneers are ready:
- Dentist removes temporaries
- Tests the fit and shade of the new veneers.
- Teeth are cleaned and etched.
- Veneers are bonded using high-strength resin cement.
After curing the cement, final adjustments are made to bite and contour.
Comparison Table: Key Stages
| Step | Purpose | Timeline |
|---|---|---|
| Consultation | Assessment and planning | 1 visit |
| Preparation | Enamel removal, impression | 1 visit |
| Temporary Veneers | Interim aesthetics and protection | 1–2 weeks |
| Lab Fabrication | Custom crafting of veneers | 7–14 days |
| Final Bonding | Placement and final adjustments | 1 visit |
Important Note
Post-procedure care is essential. Patients are advised to:
- Avoid hard foods for a few days
- Maintain excellent oral hygiene.
- Use non-abrasive toothpaste
Routine dental visits will also ensure the veneers remain in top shape for years.
How long does the process of getting veneers typically take?
On average, the process of getting porcelain veneers spans 2 to 4 weeks from the initial consultation to final bonding. However, the exact timeline depends on several factors such as the number of veneers being placed, whether temporaries are needed, and the type of impression technique used.
Single Veneer vs. Full Smile Makeover
- Single Veneer: Often completed in as little as 1–2 weeks
- Multiple Veneers (6 or more): May take 3–4 weeks due to additional planning, colour matching, and fitting sessions
Breakdown of Timeline
| Phase | Time Required |
|---|---|
| Initial Consultation | Same-day |
| Tooth Preparation | 1–2 hours |
| Temporary Veneers (if needed) | 7–14 days |
| Lab Fabrication | 1–2 weeks |
| Final Bonding | 1–2 hours |
Factors like lab turnaround times and patient scheduling can also influence the duration.
Additionally, rush orders may be available in select clinics, but they often incur additional costs and may limit customization options.
How are veneers applied during the final visit?
The final bonding appointment is critical — it’s when temporary veneers are replaced with your permanent custom restorations. The success of this visit depends not only on how your veneers look, but also on how they feel and function.
Step-by-Step Bonding Process
- Removal of Temporary Veneers – Temporaries are carefully removed, and the teeth are cleaned.
- Trial Placement – The permanent veneers are placed using a try-in paste to assess fit and colour.
- Adjustments – Minor adjustments to shape or shade may be made.
- Etching the Tooth Surface – A mild acid is applied to roughen the enamel, enhancing bond strength.
- Application of Cement – A high-quality resin cement is spread inside the veneer.
- Placement and Curing – Veneers are positioned on the teeth and cured using a blue LED curing light, solidifying the bond in seconds.
- Final Shaping and Polishing – Bite is checked, and any excess cement is removed.
Types of Dental Cements
- Light-cure resin cement – Offers more working time and excellent esthetics.
- Dual-cure resin cement – Combines light- and self-curing properties, making it useful for thicker veneers.

Are temporary veneers necessary during the fabrication process?
Temporary veneers are not just placeholders — they serve both functional and aesthetic purposes during the wait for permanent restorations.
Why They Matter
- Protect Sensitive Teeth – After enamel removal, exposed tooth surfaces can be sensitive.
- Preserve Aesthetics – Temporary solutions maintain the smile's appearance, especially in visible areas.
- Preview Results – They allow patients to assess shape, size, and alignment before final placement.
Materials Used
- Acrylic Resin – Most common due to its ease of shaping and cost-effectiveness
- Composite Resin – Sometimes used for better durability and esthetics
Care Instructions
- Avoid sticky or hard food.
- Use a soft-bristle toothbrush.
- Don’t floss between them unless advised.
What makes porcelain veneers better than composite ones?
Choosing between porcelain and composite veneers involves more than just cost — it's a decision shaped by your expectations, oral health, and lifestyle. While both options improve your smile, porcelain veneers are generally favoured for their long-term benefits.
Durability and Longevity
Porcelain is significantly more resistant to wear and tear:
- Porcelain Veneers: Last 10–15 years or longer with proper care
- Composite Veneers: Typically last 5–7 years
Aesthetics and Stain Resistance
Porcelain has superior light reflection and better stain resistance. Composite tends to dull and discolour over time, especially with coffee, tea, or wine.
- Porcelain mimics enamel's translucency, offering a highly natural look
- Composite is more opaque and can look bulkier
Cost and Value
- Initial Cost: Porcelain is more expensive upfront
- Long-Term Value: Fewer replacements make porcelain more cost-effective over time
Comparison Table
| Feature | Porcelain Veneers | Composite Veneers |
|---|---|---|
| Durability | 10–15 years | 5–7 years |
| Stain Resistance | Excellent | Moderate to poor |
| Aesthetic Quality | High translucency | Less natural appearance |
| Cost (per tooth) | Higher upfront | Lower initial cost |
| Maintenance | Minimal | May need frequent repair |
| Procedure Time | 2–3 visits | Often 1 visit |
Read also: Why Choose Invisalign Over Traditional Braces? A Full Comparison
Are there alternatives to porcelain veneers for enhancing a smile?
Porcelain veneers aren't the only route to a better smile. Depending on your dental needs, other treatments may be more appropriate — or even combined with veneers.
Composite Bonding
A quick, minimally invasive procedure where tooth-colored resin is applied and sculpted:
Pros:
- Inexpensive
- Single-visit treatment
- Good for small chips or gaps
Cons:
- Less durable than veneers
- Prone to staining
Dental Crowns
Used when teeth are structurally compromised or have extensive decay:
Pros:
- Covers the entire tooth
- Extremely durable
- Restores both form and function
Cons:
- More invasive (requires more enamel removal)
- More expensive than veneers
Invisalign or Clear Aligners
Ideal for patients with misaligned or gapped teeth:
Pros:
- Non-invasive
- Corrects alignment
- Healthier in the long term for the bite
Cons:
- Long treatment timeline (months to years)
- Doesn’t address colour or surface imperfections
Whitening Procedures
For patients mainly concerned with discoloration:
Pros:
- Non-invasive
- Affordable
- Quick results
Cons:
- Doesn’t change shape or alignment
- Results fade over time
Comparison Table
| Treatment Option | Best For | Pros | Cons |
|---|---|---|---|
| Porcelain Veneers | Shape, colour, minor alignment | Aesthetic, long-lasting | Cost, enamel removal |
| Composite Bonding | Chips, discoloration | Fast, affordable | Less durable, stains |
| Dental Crowns | Damaged or decayed teeth | Strength, full coverage | Invasive, more costly |
| Invisalign | Alignment issues | Preserves tooth structure | Time-consuming |
| Whitening Treatments | Surface stains | Non-invasive, quick | Temporary, limited scope |
What’s the full summary of the veneer process from start to finish?
Bringing a new smile to life through veneers is a step-by-step journey, involving precision, customization, and patient collaboration.
Summary Table: Full Veneer Process
| Step | Description |
|---|---|
| Consultation | Assess oral health and goals, discuss expectations |
| Tooth Preparation | Enamel shaping, impressions taken |
| Temporary Veneers | Placed if needed for appearance and protection |
| Lab Fabrication | Custom porcelain veneers crafted in a dental lab |
| Final Bonding | Veneers cemented in place and polished |
| Post-Care | Oral hygiene, follow-ups, and possible minor adjustments |
Final Tips for Patients
- Choose an experienced cosmetic dentist – Skill has a dramatic impact on outcomes.
- Ask for previews or mock-ups – Helps set realistic expectations
- Prioritize oral health first – Gum disease or decay must be addressed beforehand
- Understand the commitment – Veneers are a long-term solution, but require responsibility
Cited Sources
- American Dental Association (ADA) – https://www.ada.org
- Canadian Dental Association (CDA) – https://www.cda-adc.ca
- Journal of Prosthetic Dentistry – https://www.journals.elsevier.com/journal-of-prosthetic-dentistry
